KONTAKT: ADD AN ARPEGGIATOR TO ANYTHING - AND COMMAND IT WITH EASE
KONTAKT TIPS, TRICKS & HACKS SERIESIf you’ve been using Kontakt for a while then chances are that you have a library that has some sort of rhythm grid used in conjunction with an arpeggiator, or, to rhythmically modify some other parameter like pitch, volume, pan or filter cutoff.
And if you don’t, you can load the factory arpeggiator script to any Kontakt instrument as we will do here.
FOUR FOR THREE
Load Kontakt’s factory arpeggiator script by entering into “Edit Mode” (by pressing the wrench icon), pressing the “Script Editor” button, and then following the “Preset” menu list to: Factory -> Sequencing -> Arpeggiator.

Load Kontakt’s factory arpeggiator script by entering into "Edit Mode" (by pressing the wrench icon), pressing the "Script Editor" button, and then following the "Preset" menu list to: Factory -> Sequencing -> Arpeggiator.
Out of the box, if you hold a note, the rhythm table will play each note at the same velocity.

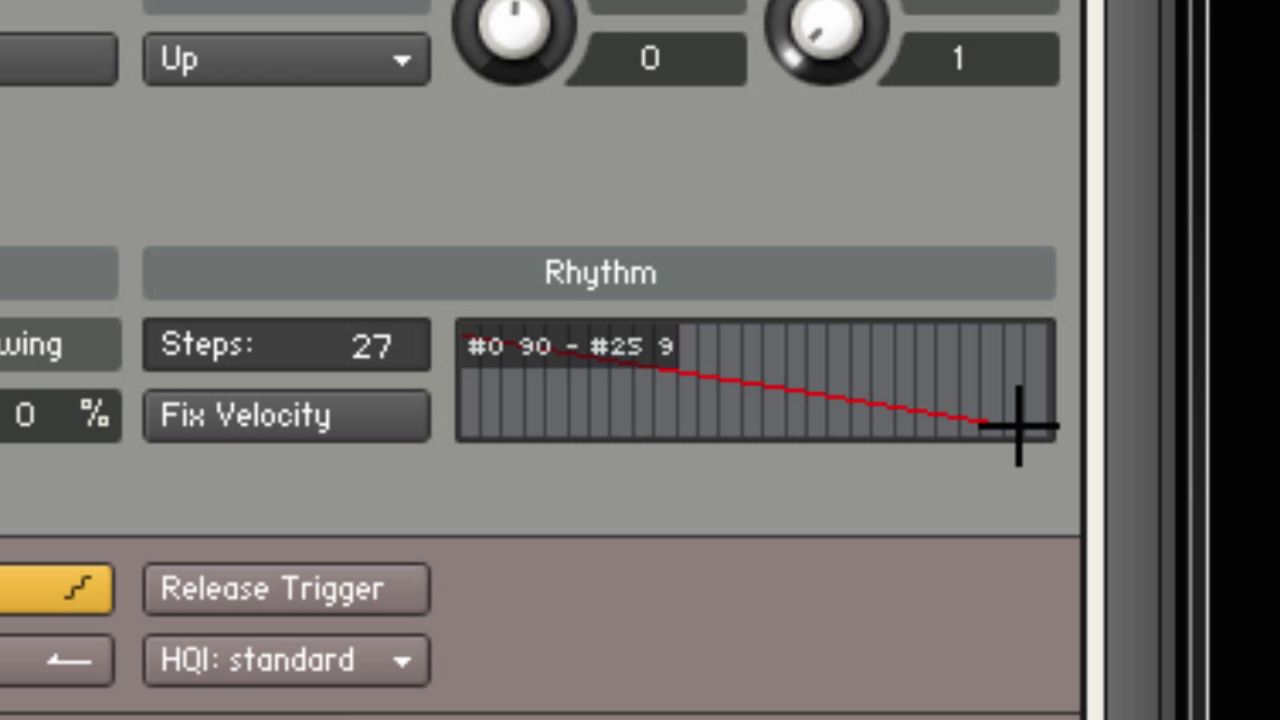
This is Kontakt’s Factory Arpeggiator Script. To the lower right is the Rhythm Table.
But with some quick mousing around you can make this a bit more interesting.

Mouse over and click on any of the grid lines to adjust the velocity and rhythm of the Kontakt’s arpeggiator pattern.
But depending on the size of the grid, it can be tedious to get the rhythm the way you want. This one is on the small side.
So here are a few tips that will help you work a bit more quickly and with greater accuracy.
First off, determine how many steps you really need. If all you need is a four step pattern to repeat, change the table size to four steps.
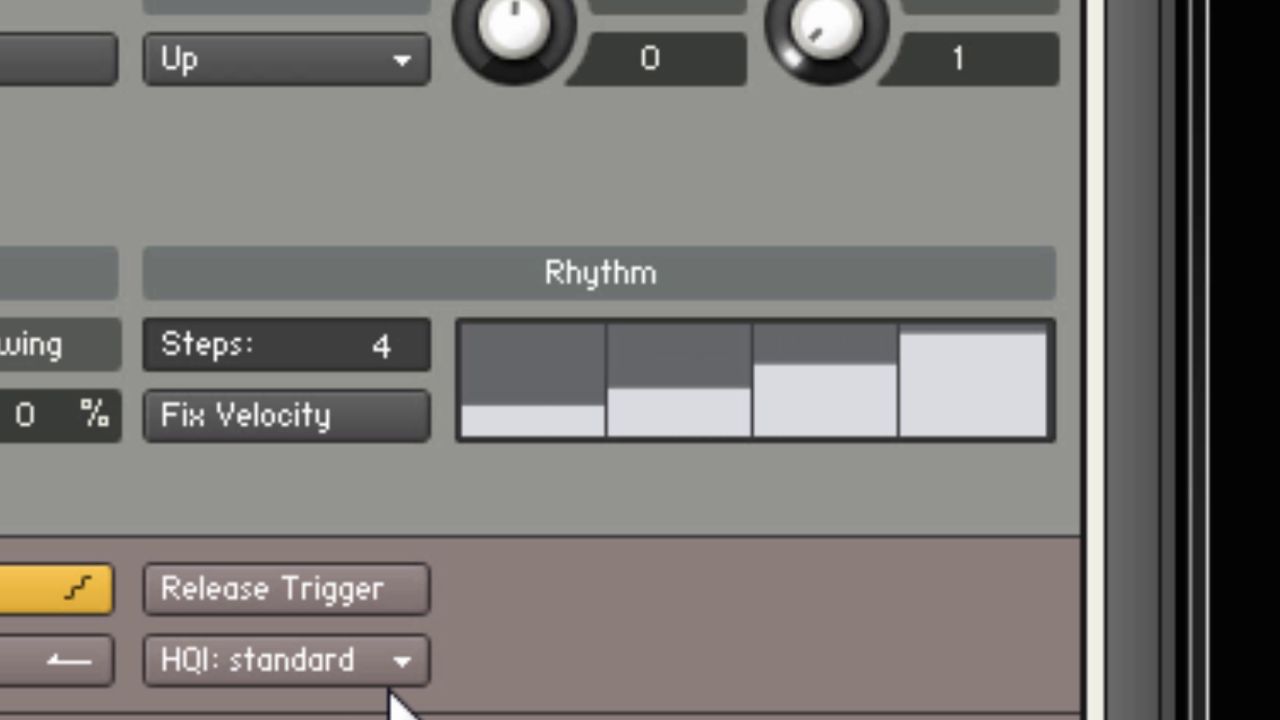
The amount of steps can be changed by clicking and dragging the number next to the the "Steps:" field.
Secondly, if you need to turn a step off, hold Control or Command and then click on it to send it to 0.
This is nice because if you have a lot of steps close together, it’s easy to accidentally mouse over an adjacent step and modify it in the process.
You can also use this command to clear an entire grid. Just hold Control or Command and drag your mouse across the table.
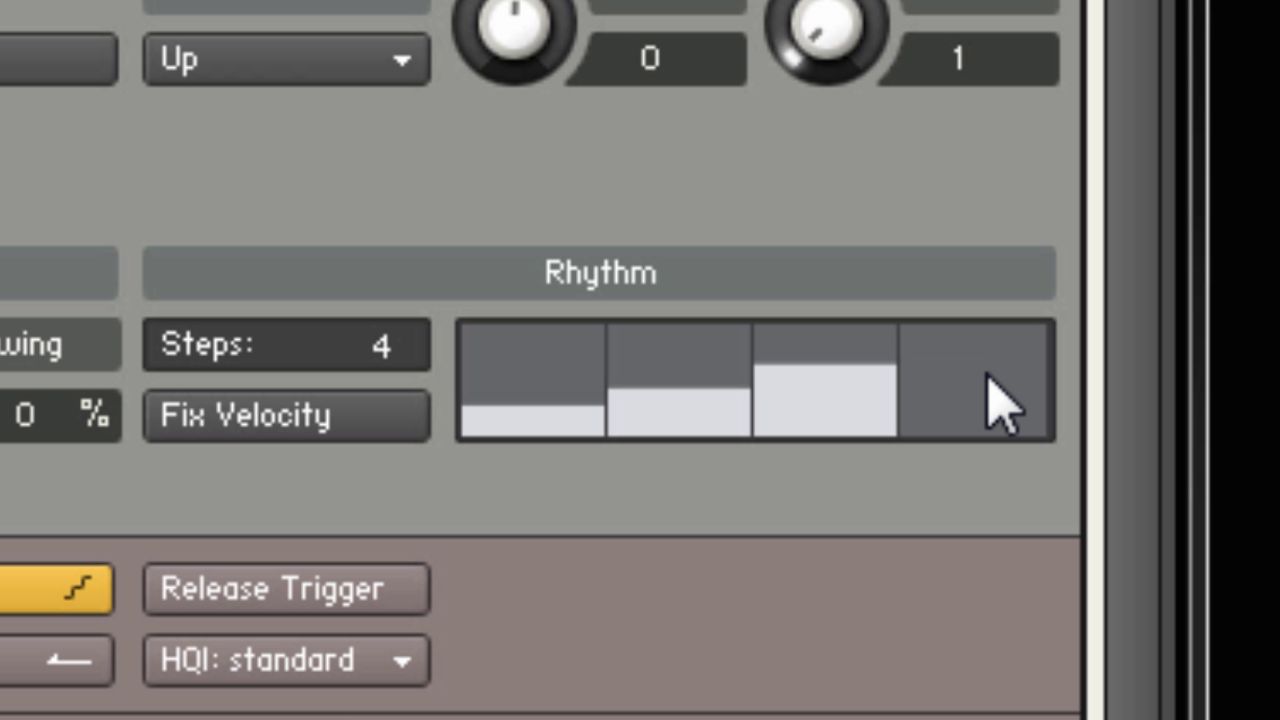
To immediately set a step to "0" Ctrl + Click (PC) or Command + Click (Mac) on any step of the rhythm table. To set all steps to "0", hold Ctrl/Cmd + Click and drag the moust across all the steps.
Third, if you want to create consistent rise and fall patterns, it can be quite difficult to achieve with any accuracy. Particularly when the grid has a lot of steps.
In these cases you can right click and drag your mouse to create a guideline by which you can draw consistent rise and fall patterns.
Our Fluid Harmonics library has the ability to run 15 rhythm grids simultaneously - all of which can respond to the mouse and key commands mentioned above.